Frolla Montata are delicate Italian butter cookies with a light, buttery texture that melts in your mouth. Traditionally piped into beautiful shapes before baking, these classic Italian biscuits are simple yet incredibly delicious. Perfect with coffee, for gifting, or adding to dessert platters, they’re a timeless recipe that looks impressive while using simple pantry ingredients.
Frolla Montata (Italian Butter Cookies)
Frolla Montata (Italian Butter Cookies)
Ashley's Place
35
15 minutes
15 minutes
Italian
Baking
These are some of my favourite cookies to make and dipping them in chocolate just makes them even more delicious. They are really light and airy biscuits that are perfect with a cuppa for afternoon tea, they also make a beautiful gift for someone too.
Ingredients
Ingredients:
- 400g 00 Flour (*See note 1)
- 250g Room Temp Unsalted Butter (*See note 2)
- 1 Large Egg (needs to be large approx. 60-65g)
- 150g Icing Sugar (confectioners sugar)
- 1 Tsp Vanilla Essence
- A pinch of salt
- 1 Block of Chocolate (180-200g) I use Nestle Plaistowe 40% Dark but pick your fav
Tools Needed:
- 1 x Piping Bag
- 1 x Open Star Piping Tip (*See note 3)
- Stand Mixer or Hand Held Mixer
- Large Baking Tray with Baking Paper (use 2 smaller ones if you don’t have a large)
Directions
Take your butter and eggs out of the fridge and let them both come to room temp, the timing will depend on the weather but they need to be room temp otherwise it will be really hard to pipe your cookies
Pre-heat your oven to 175°C (350°F) and line your baking tray with baking paper
Once the butter is room temp chop into small pieces, add to your stand mixer with the paddle attachment, mix with the sugar for a good 8-10 minutes scrape down your bowl half way. Don’t skip this step either, we need to make sure it is light and airy, one for texture but 2 so that it’s easy to pipe
Once that is mixed and light and fluffy, scrape down the bowl and add the egg in and mix again until it is fully incorporated, don’t stress if it looks like it isn’t at the start it will do and if you need to scrape the bowl again
Add in the flour in a few parts while mixing on low speed. Once it is all added only mix until it is just combined and turn off the mixer
Add your cookie dough to your piping bag, with your piping tip. Depending on the thickness/quality of your piping bag it might be added in ½ parts, pipe the cookies then add the other half. Sometimes if your piping bag is thinner etc it can be hard to pipe if you over fill it.
Hold the end of the piping bag and twist it around so the cookie dough doesn’t come out the other end. Then use your other hand at the other end to guide the bag and start to pipe your shapes. Don’t worry about making them perfect, honestly they come out fine and tasty no matter what. I like to do circles and squiggle lines but you can even do straight lines. Make sure you leave some a couple of cm gaps in-between as they expand when baking.
Bake away in the oven for 15 minutes or until they are cooked. You want these to be just baked if they are starting to go golden take them out as they still keep their lightness
Leave them to cool on the tray for at least 5-8 minutes then take them off and pop them onto a cooling wrack to cool completely. If you are popping chocolate on see below steps if not once cooled pop them into a sealed container to keep them fresh for about 5-7 days at room temp, a week or more in the fridge and 3 months in the freezer. Storing tips below in Notes
Chocolate Topping:
Once cooled melt your chocolate, if you want them all half covered use the whole pack if you only want half use half the block. You can always melt more if needed. Melt in the microwave in 30 Second bursts then mix really well in-between each burst. It should only take 1-1.5 minutes to melt
Pop a piece of baking paper under your cooking wrack so the chocolate can drip on it
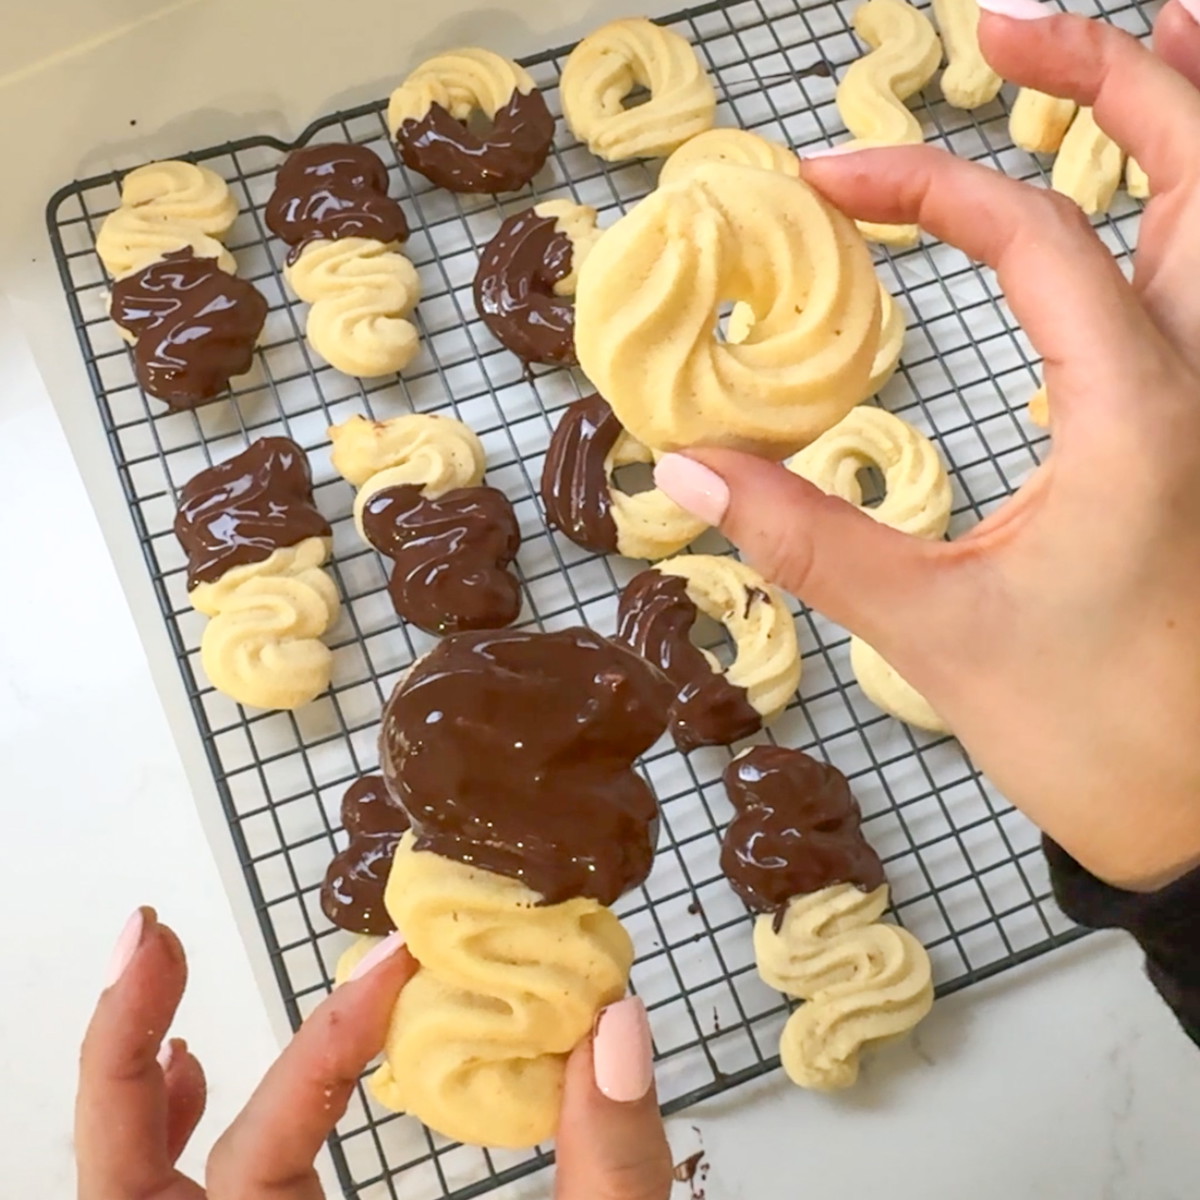
Now dip your completely cooled cookies in your chocolate lightly so they don’t break or use a spoon to spoon it over the top.
And pop them back on the wrack to dry and the chocolate to set. You can pop these in the fridge if its super hot or humid where you are.