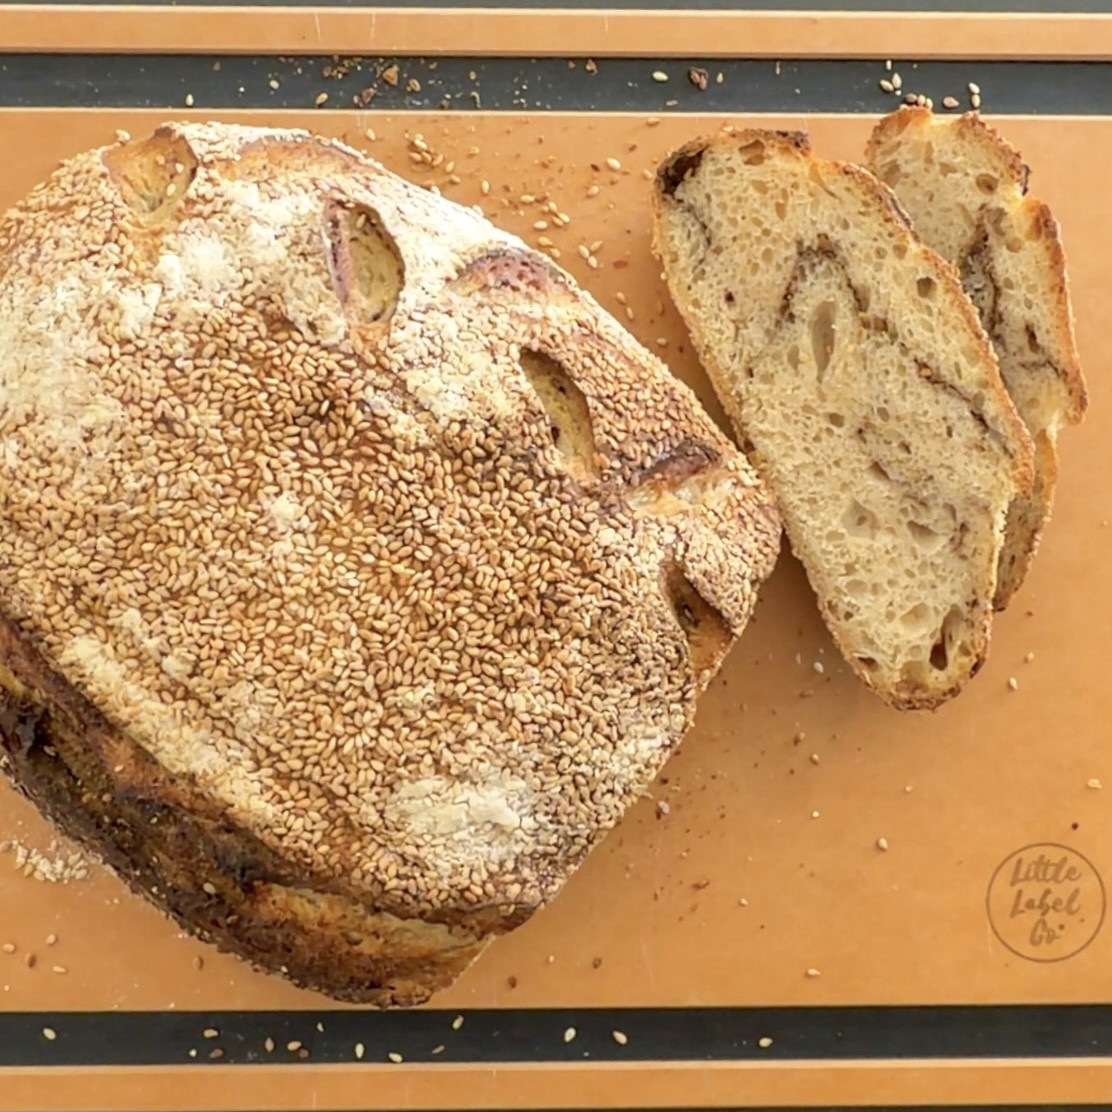
This Zaatar Sourdough Bread is a delicious twist on homemade sourdough, combining a beautifully fermented loaf with the fragrant, savoury flavour of za’atar. The za’atar is layered through the dough, giving you pockets of flavour throughout the loaf while still letting that classic sourdough crumb and crust shine. If you love za’atar and sourdough, this is such a fun way to bring the two together and make your everyday loaf a little more special.
Za’atar Sourdough Bread - Flavour-Packed Homemade Sourdough
Za’atar Sourdough Bread Recipe
Ashley's Place
6
24 minutes
45 minutes
Australian
Sourdough
If you love Zaatar you are going to love this Zaatar Sourdough Bread it is delicious. Toast it up with a spread of delicious butter it is perfection. It is one of my new fav ways to make sourdough.
Ingredients
- 500 g of High Protein Flour *see note 1
- 100 g of Starter *see note 2
- 325 g Water
- 10 g Salt (approx 1.5tsp-2tsp of salt depending what you use) *see note 3
- 1.5 Tbsp’s Za’atar Spice (*see note 8)
Directions
To start this process you need to feed your starter to make sure it is active and at the right point to use. This depends on the temperature, your starter and how quickly it rises. If its hot this may be 4 hours prior if not if may need to be done overnight. You want it to be at it’s peak when we use it (*See note 2). We are feeding it the 1:1:1 Ratio and you want to do at least about 50g so you have 100g the next day and still a bit left to feed
Once your starter is ready to use, add your starter and 315g water into a bowl and mix well. Then add your flour and mix that all together until your flour is all combined. It will be more of a shaggy looking dough. Cover the bowl in a damp towel or cover and leave that for about 30 Minutes
Add your remaining 10g of water with 10g of salt and then add into your dough mixture. Once it is added push down with your fingers to mix in the water and salt and mix around until your salt and water is combined. You don’t need to knead this just mix it around
Now we leave it again for about 30 minutes and then do your stretch and folds every 30 minutes for about 2-3 hours. Make sure you cover it after ever stretch and fold so it doesn’t dry out.
To do the stretch and folds, you can wet your hands to help it not stick to your hands as much and then simply lift one side up in the air and push lightly into the center of the dough, turn your dough and do the next one, you do 4 folds and repeat this 2 x 4 folds, so 8 folds in total. Flip that over so the seem is on the bottom and leave again. Do this every 30 minutes or so, you don’t need to time the 30 minutes I just roughly do it every 30 mins
Once it has been about 2-3 hours and you have done your stretch and folds you want to leave it alone covered in the bowl for about 3-4 hours. A little tip here you can actually move it to a straight edge glass or clean container if you have one, when you put it in mark where the dough is with a texter or sticker. Because the dough goes straight up it is so much easier to see when it doubles rather than it a bowl.
If you are in colder temps like we currently are in Australia in winter this may take up to 6-8 hours mine actually has been taking closer to 8-9 hours as the temps here have been cold. It will depend on the dough and your temperature in the house. You want it to to be puffier, slightly domed and a bit jiggly and doubled in size. You may notice bubbles on top and it starts to slightly pull away from the sides. If you don’t leave it for long enough to proof it can be gummy even when fully cooked.
If it is humid where you are try doing a 70-80% rise instead of double and if its super humid you may need to skip the next step and just shape it and pop in the bowl (see note 7*)
Once it has risen take it out of your bowl onto the bench. We want to do this stretch and fold again about 8 times again and then we want to start shaping it into a ball. Either by pulling the folds together into the middle and joining them or rolling your dough around on the bench to create a lovely ball shape and leave on the bench for about 30 minutes in this shape covered with a tea towel (I use the towel from my bowl). If it is humid, super hot or your dough is possibly going to overproof skip the bench rest and add in your zaatar straight away, steps below
Pull and spread your dough into a rectangle shape & then sprinkle ½ tablespoon of zaatar all over the dough top, fold one side over half way into the middle, then sprinkle another ½ tablespoon over the folded section. Fold the other side over the top of the side we just pulled up so that it is covered and sprinkle with the remaining ½ tablespoon of zaatar on the very top. We do this so that it then distributes evenly
Once all the zaatar has been added and the dough is back in a log shape, roll and shape the dough as you normally would. Place into your prepared banneton, seam-side up, ready for its final proof.
Place it either in your bread basket covered with flour or place into a bowl with a tea towel dusted in lots of flour as you don’t want the dough to stick to either one. Pop covered into your fridge overnight. Make sure the basket or bowel is completely covered we don’t want it to dry out on top
About 1 hr before you are ready to bake pre-heat your oven to 240°C or with your pizza stone or if using a tray probably only 30 mins as a Pizza stone takes time to fully heat through if using a Dutch oven do the same putting it in for about 45 minutes prior to really heat up (just make sure your Dutch oven can handle the higher heat). And at about 20-30 minutes before add a empty shallow tray for your water to go in on the bottom of the oven if you are using your tray or pizza stone you can skip this step if using a Dutch oven.
If using a stone or tray start to boil your water so its ready to go. Get your dough out of the fridge and flip it out onto a piece of baking paper just a bit bigger than your loaf. This is so you can score the dough without being on the hot surface and it starts to spread. You want the seam side down and the smooth side facing up, with a sharp knife score the top of the bread in a line at least 1cm deep or add a design if you like, I like to do both so that I make sure it has a good slice in it then I add a design on the other side, you want to go about 1cm deep for this as it helps the bread rise evenly in the oven. Now once it is sliced get your stone or Dutch oven out and pop your bread on top you can leave the baking paper underneath while it starts to bake.
Place your stone/tray with bread in the oven and add some boiling water to the empty tray on the bottom shelf of your oven to create a steam inside, this is so the crust forms but the inside cooks* See note 5
Bake away for a good 20-25mins and then turn the temp down to 210°C and cover in foil if the outside is browning quickly and remove the water tray in the bottom we only need this the first half of the cooking. If using a pizza stone you can remove the baking paper but please do this with oven mitts or a tea towel it is hot! We want to bake it at the higher temp to help it rise and crust the outside but then we want to lower it and cover the top so that it cooks through and the bottom is cooked well too. You want to bake this for another 25-30 mins until it is baked through and the base is golden as well. If your base is still blonde it likely needs more time
Your cooking time will depend on the shape size etc of your loaf, but it should be lovely and golden brown if the base is still blonde then keep baking. Leave to cool completely before slicing as things keep cooking as they rest just like in baking so you need to leave this for quite a few hours as it can be doughy if not cool.
Shorten version of instructions:
Feed your starter and leave to rise
Mix 310g water and starter together, add flour and mix together. Leave for 30 mins covered, the add rest of the water and salt and mix together. Leave for 30 minutes again covered then do stretch and folds for 2-3 hours every 30 minutes. Then Leave for 4-8 hours untouched to double and dome.
Turn onto your bench, fold and stretch your dough 8 times at least and shape into a ball. Leave covered with a tea towel on the bench for 30 mins. Pull into a rectangle add ½ tbsp Zaatar, fold half of the dough into middle, add another ½ tbsp, fold the other side, add last ½ tbsp and roll the log tightly so zaatar is on the inside.
Re-shape for the final shape into a tight ball or the log depending on what you are making and add to flour covered basket or bowl
Pop into the fridge overnight covered
Pre-heat your oven to 240°C with pizza stone or dutch oven for 1 hour and add shallow tray to the oven 30 mins in. Boil your water
Flip your dough onto baking paper seam side down, slice a 1cm cut into the dough and add 2cm and then pop onto your stone or Dutch oven or so of boiled water into the shallow tray (place this on the bottom of oven) and bake for 20-25 mins then turn oven down to 210°C to bake covered in foil for another 25-30 mins until golden and baked through
Leave to cool before slicing